
pho
May 6, 2013 § Leave a comment

Its been two and a half months since we moved to Darwin. In that time, I have started making a basket out of scrap material collected over my 29 years, made huge amounts of pickled cucumbers, watched far to many murder mysteries, tried to commit myself to balancing on my head at least once a day, finally got a job, and consumed large quantities of pho. AND pho could just so happen to be the very best thing that has happened to me since I arrived. A traditional Vietnamese soup, it’s so easy to make, and so so tasty.
As I have learnt, there are a few things you need to consider when making pho. The first is your stock. I always recommend people make their own stock out of organic meat, rather than buying it from the store. Not just because it tastes so much better but because homemade stock is very very good for you.
For pho, I have made and used stock from chicken, beef and fish. All work well, just adding a slightly different flavour. Just remember that fish stock can be quite strong, so adjust the quantities as needed.
The next thing you need to consider is the herbs you garnish your pho with. My favourite by far is Thai basil, but you can also use coriander, mint and traditional basil or combinations of each.

How to make stock
To make stock, I usually use the leftover bones and carcass from the previous nights roast dinner (about 1 – 2 kg). If I haven’t had a roast in a while, I will sometimes use 4 chicken drumsticks instead. I will place them in a large pot with one or two bay leaves and a good pinch of salt. Some people add vegetable scraps too and you can if you want. This is then covered with water, (about 4 – 6 litres) and brought to the boil before leaving to simmer for 3 – 4 hours, skimming the scum as needed. This can then be frozen into serve size portions (say two cups each) and used when needed. It will keep in the fridge for about 4 days and in the freezer for 3 – 4 months.
Pho (serves 4)
For the broth
4 cups stock
4 cups water
4 star anise
1 – 2 cinnamon quills
1 inch piece of ginger cut in half
1 onion cut into quarters
4 cloves garlic peeled
1/3 cup fish sauce
To serve
375 g flat rice noodles
Roughly 300 g organic beef very thinly sliced
2 limes cut into quarters
A bunch of fresh Thai basil
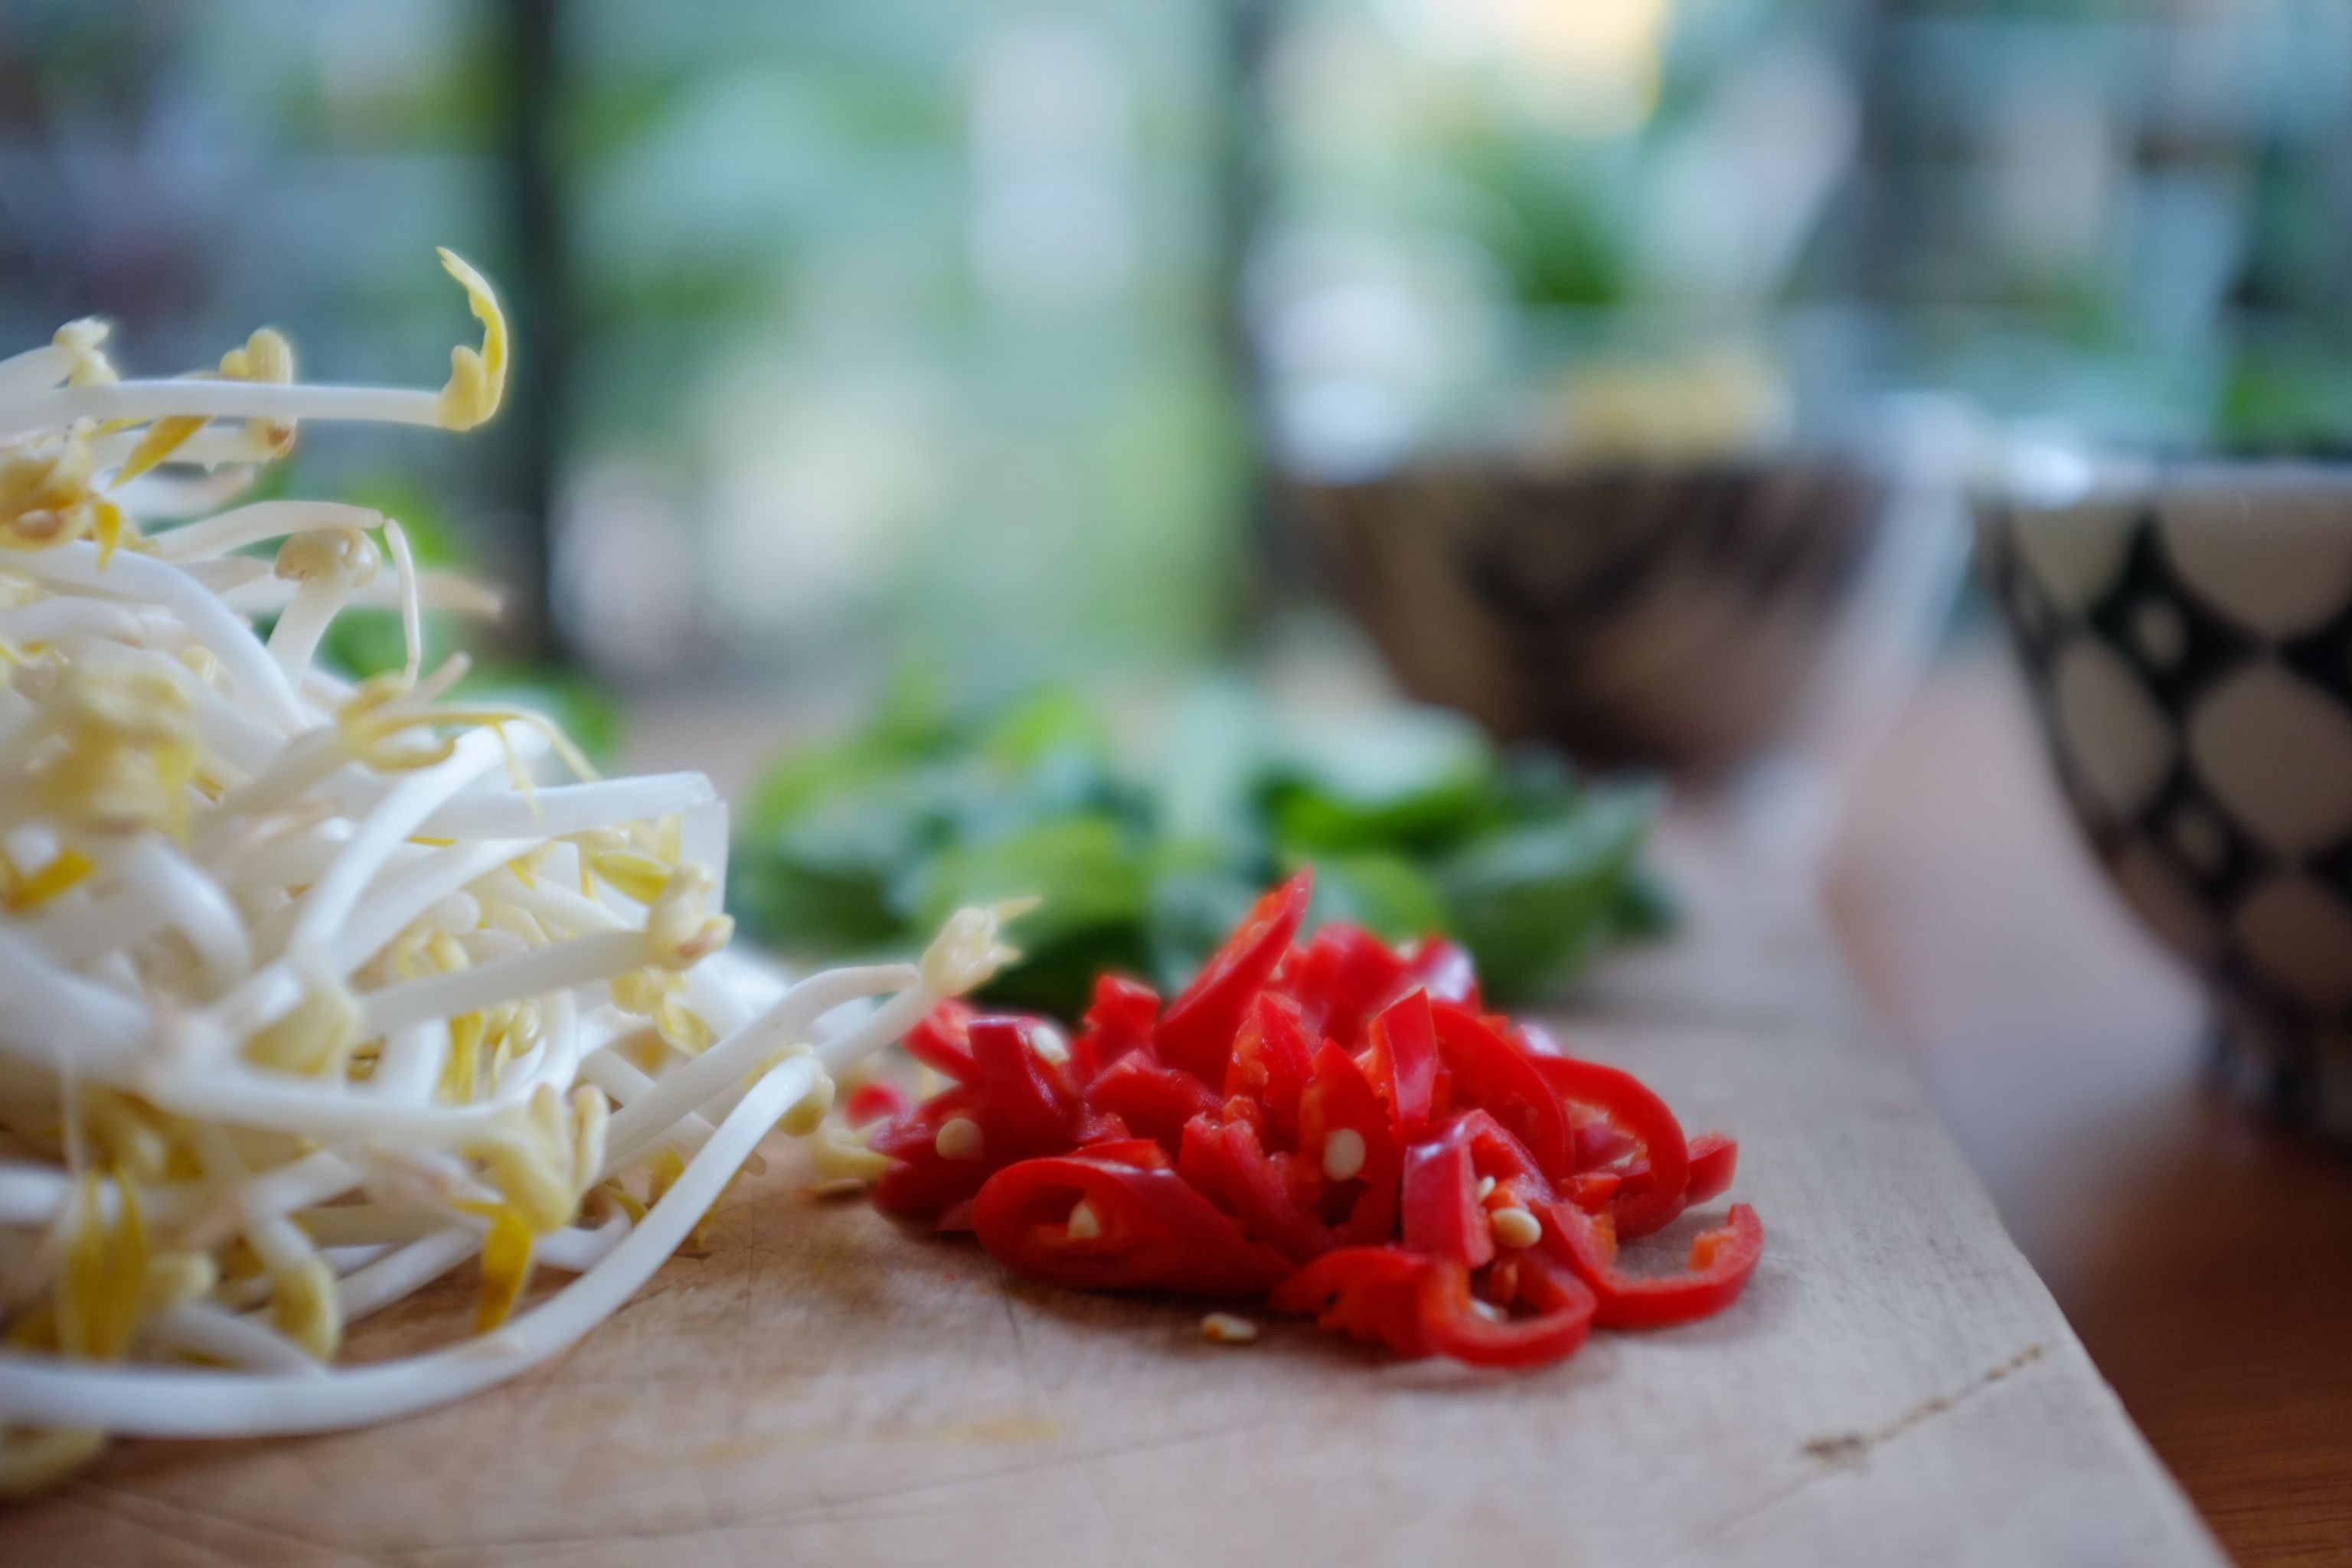
About 200 g beansprouts
2 fresh chillies cut into strips
Chilli sauce (optional)
Hoisin sauce (optional)
Additional fish sauce
Method
Place, stock, water, star anise, cinnamon, ginger, onion, garlic and fish sauce in a large saucepan and bring to the boil. Cover and allow to simmer for around 30 minutes.
In the meantime, cook rice noodles as per package suggestions, and arrange limes, basil, bean sprouts, chilli and sauces on a serving plate in the middle of your table.
Divide the cooked noodles into 4 bowls. Place the raw beef strips on top and cover with steaming hot broth. The hot broth will cook the meat as it makes its way to the table. Allow people to add the additional ingredients in the centre of your table, as per their liking.
Jamie’s baked fish
April 19, 2013 § 1 Comment

I am currently elbow deep in a pot of pho broth which I will share with you all very soon. But before I do I wanted to draw your attention to Jamie Oliver’s delicioius baked fish recipe that I was making a lot of before I left Melbourne. I love it! And am despertate to squeeze it in here before tomatoes and basil are completely out of season for all you southern people. Strange as it may seem, April is the time Territorians plant their Solanaceaes. Its the time when the air changes texture. The moisture relents. The blessed dry is around the corner.
So here it is. Jamie Olivers incredible baked fish. Perfect for summer evening dinner parties. Lick your plate good. In his recipe Jamie suggests using Sole, but I used Trout. Any whole flat fish will work.
On another note, I also started baking just the vegies and herbs, prepared as he suggests below but without the fish. This made for a delicious pasta sauce.
Serves 4
Ingredients for Jaimie Oliver’s Baked Fish
4 whole lemon soles, from sustainable sources, ask your fishmonger
2 handfuls red and yellow cherry tomatoes, halved
4 cloves garlic, peeled and finely sliced
1 handful fresh oregano or basil, leaves picked
1 bunch spring onions, trimmed and finely sliced
1 tablespoon balsamic vinegar
sea salt
freshly ground black pepper
zest of halved 2 lemons
extra virgin olive oil
1 handful black olives, destoned and chopped
1 handful fresh flat-leaf parsley, finely chopped
Method
“This is really simple. First of all give your fish a wash, then with a sharp knife score across each fish down to the bone at 2.5cm/1 inch intervals on both sides. This allows flavour to penetrate the fish and lets the fish’s juices come out.
Preheat the oven to 200ºC/400ºF/gas 6. Get yourself a bowl and add the tomatoes, garlic, oregano or basil, spring onions, balsamic vinegar, a pinch of salt and pepper and the zest and juice of 1 lemon to it. Loosen with a couple of good tablespoons of extra virgin olive oil and mix well, then spread over the bottom of a large roasting tray. Use one that will fit all 4 fish quite snugly (or you can use two smaller trays). Place the fish on top – top to tail.
Now add the olives, parsley, juice and zest of the second lemon to the bowl that the tomatoes were in. Loosen with a little olive oil and then divide this mixture between the fish, placing an equal amount on the centre of each. Cook in the preheated oven for 12 to 15 minutes, depending on the size of the fish. To check whether they’re done, take the tip of a knife and push it into the thickest part of the fish. When done, the flesh will easily pull away from the bone.
Once cooked, remove the fish from the oven and allow them to rest for 3 or 4 minutes while you get your guests round the table, serve them some wine and dress your salad. Then you can come back to the fish. Divide them up at the table on to 4 plates, making sure that everyone gets some tomatoes and juice spooned over the top of the fish. ”
Enjoy!
The above recipe was taken word for word from here.

The two photos in this post were taken last year around this time. Here is what I posted on then.
spelt hot cross buns
March 30, 2013 § Leave a comment

I remember making hot cross buns with my mum and sister when I was very young. I remember the smell of orange and spice bouncing off the kitchen walls and making it bright and warm.Often the fire would be on because the weather had started to turn by then and my sister and I would stand on chairs at the kitchen bench rolling out the little white stripes of dough to become the crosses, placing them haphazardly on top of the buns before they went in the oven. We would prove the dough on the backseat of the car which mum would have parked in the sun. Covered with a damp tea towel and sitting wonkily on the seat, this would always amuse me.
I have always loved hot cross buns, who wouldn’t – the smell of yeast and spice, warm and gently sweet, melting with butter. What a shame people only tend to eat them one day of the year.
Here I have a recipe that is not my mothers, in-fact there is no sentimental story behind it whatsoever. I found it today, not even in a well-loved, old and creased cook book, but on the internet. And it is good. So much so that I wanted to share it with you all. Perhaps if your quick you may be able to whip up a batch for tomorrow.
Below is my version of the recipe I found. It is quite similar to the original except I used spelt flour instead of wheat, orange zest instead of dried orange peel, honey instead of sugar and I added a pinch of clove.
Recipe for Spelt Hot Cross Buns
2 tsp dried instant yeast
3 ½ cups plain spelt flour
1 Tbsp honey
300 ml milk
1 tsp salt
1 tsp cinnamon
½ tsp ground all spice
¼ tsp freshly grated nutmeg
Pinch of ground clove
60 g butter
1 large egg lightly beaten
1 ¼ cups sultanas, currants, or raisins
Zest of one orange
Crosses
2 Tbsp flour
2 Tbsp cold water
Glaze (optional – it ends up making the bun sweeter if that is what you like)
2 Tbsp sugar
¼ tsp cinnamon
150 ml boiling water
Sift the flour into a small bowl and add the water. Mix thoroughly to form a thick paste. Spoon into a pre-used and cleaned zip-lock bag. Cut a little hole out of the corner of the bag and use it to pipe the mixture in crosses on top of the buns (not the way we did it when I was young, but I have to say, so much easier).
Bake in a preheated oven at 220°C/390°F for 15–20mins.
Whilst the buns are in the oven prepare the glaze by mixing all ingredients and dissolving the sugar in the boiling water. Brush this mixture over the buns as soon as they come out of the oven and whilst they are still hot.
all about dragon fruit, iced green tea and being grateful
March 21, 2013 § 1 Comment
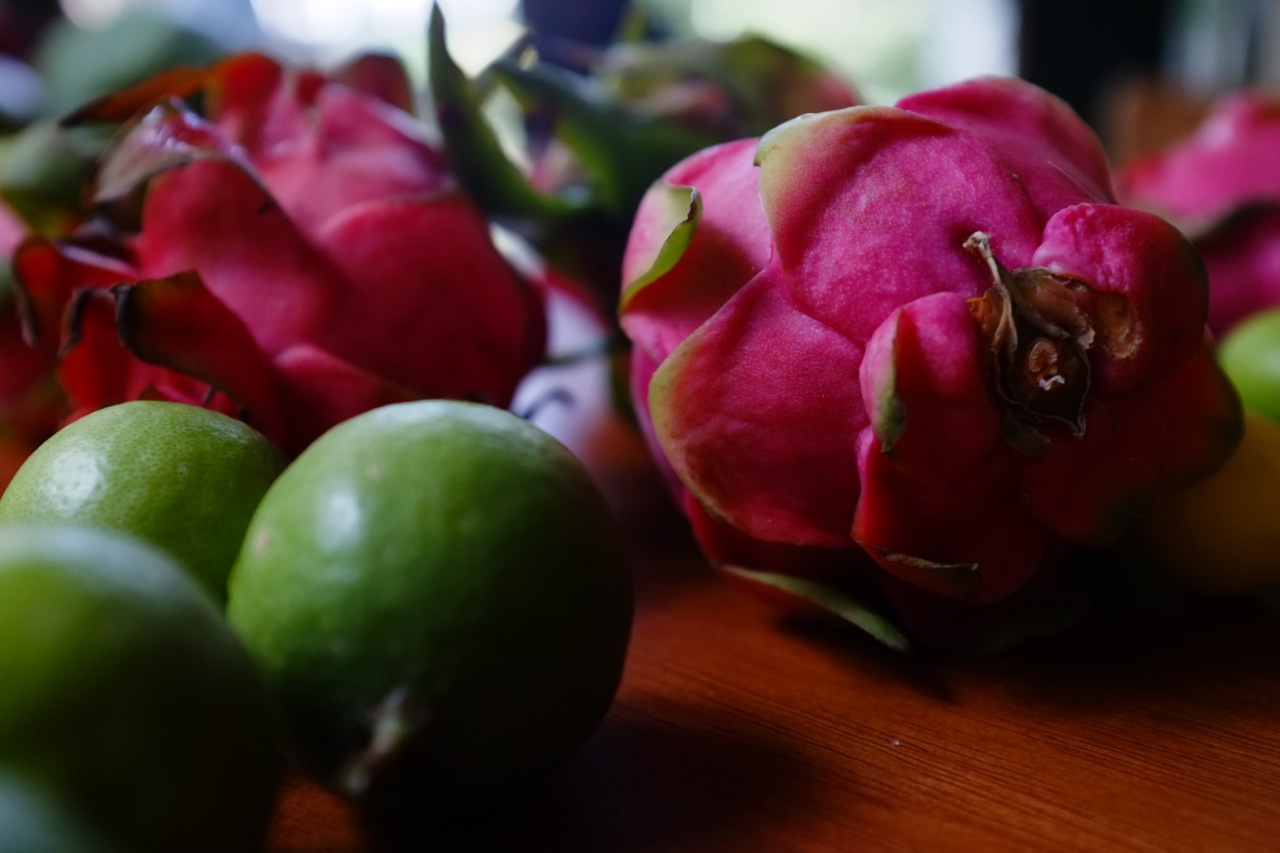
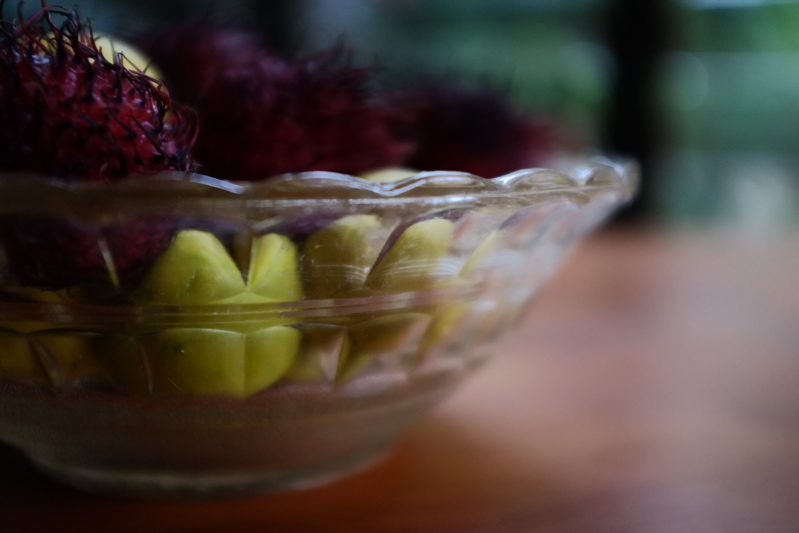
There have been days when I have watched the clouds and the sea, breathed in the hot air, walked through the night when its pouring rain, listened to the jungle foul in our back yard, rode home at dusk in an electric sky, eaten green paw paw salad, bought armfuls of local mandarins, rambutans and dragon fruit at Rapid Creek market and loved this place. And then there have been days when I have questioned every reason I’m here and what it is I am trying to pursue. I have missed my southern friends, a good cup of coffee, cute little cafes with beautifully dressed waitresses, newspaper headlines that resemble some mild form of intelligence and a local radio station that I enjoy listening to. Luckily these moments can usually be fixed with a jar of pickles and an hour or so spent in the hammock watching the evening sky. Or eating oatcakes and admiring the little green tree frog that croaks outside our kitchen window and even sometimes comes in for a visit. And if this doesn’t work, a few stern words to myself about how great it is to be a little lost and not know what lies ahead because that way anything is possible.

But today is not a pickle and hammock day. Today is a green tree frog, cloud watching, rain walking day and I am grateful. I am grateful to my friends and family who have rung me up to ask me how things are going up here and told me not to worry, I’ll get a job soon. I am grateful to that person who is going to employ me sometime soon. And I am grateful to my new friends, one of whom wrote me a welcome card when we arrived, made me iced green tea and taught me the only way to eat dragon fruit – which is with lime. Or I guess lemon would probably work too.
I had only tried dragon fruit once or twice before and never really liked it or given it much thought. Perhaps this was because I lived in the south and it was far away from its tropical context. But more importantly, I think it was because it was lacking in preparation. Lime turns this fruit from somewhat dull and strange in taste to subtle and delicious, just like that. I hate to think of all the people who may have given up on it like I did, simply because they had never tried it this way. So, if you ever come across one of these striking fruits, that grows on a cactus, is about the size of a fist and has pink skin with protruding green wing like tips, I dare you, no I beg you, to take one home and cut it open. Their flesh is either a deep and intense red or white but always speckled with tiny black seeds that crunch ever so slightly in your mouth. Once you have finished admiring the way its red flesh has stained your knife, or the starkness of the pink skin against white, divide it into quarters or eighths, squeeze half a lime (or lemon?) all over it, and eat it up. It just so happens to have become one of my near favourite things. Even though it took some persuasion and more than one attempt.

And finally, inspired by my friend Nia, I really recommend iced green tea, especially when it’s infused with ginger, fresh mint and, yes, you guessed it – lime, which conveniently grows on a tree in our back yard. This is so refreshing poured in a glass with ice and sipped slowly at the kitchen table. Or with your feet up on a couch. Or in a hammock watching the sky!
Here is the recipe.
Iced green tea with ginger, mint and lime
4 cups boiling water
½ cup cold water
4 heaped teaspoons loose leaf jasmine tea
1 heaped tablespoon of honey (or to taste)
4 – 6 thin slices of ginger
Juice of 1 large or 2 small limes
A handful of fresh mint
Bring 4 cups of water to the boil. Turn off the heat. Add 1/2 a cup of cold water. Then add the tea and steep for 2 minutes. Strain into a largish vessel. Add the ginger and honey and stir in. Leave covered on the bench to cool. Once the liquid has reached room temperature add the lime, mint ice and serve.
Hint # 1– Its a good idea to make double and reserve what you don’t drink straight away in the fridge for later. In this case its best to hold off on adding the lime, mint and ice until just before you drink it. It remains nice and fresh that way.
Hint # 2 – By adding 1/2 a cup of cold water you prevent the tea from being scolded and thus turning bitter. Interestingly however, green tea is very high in antioxidants, which are enhanced if you use boiling water to infuse your tea. Therefore if you choose health over taste, don’t bother adding the cold water before adding the tea.

humble beginnings
March 11, 2013 § 2 Comments

Our new life is settling into itself. A bed has been made out of scrap wood from the recycling centre, a portable oven found in our land lords shed, a table, two chairs, a fridge and no job!… yet.
There is something rather fragile and strange about things when they are just beginning. A humble recipe of uncertainty, insecurity, space to be reflective, waiting, letting go, anticipation, and in this case, much time left to watch the rain. And boy does it rain, heavy thunder on our roof.

The first thing I felt like cooking when I arrived in Darwin were these Oatcakes – probably for their comforting nature. They are halfway between a cracker and a biscuit being both salty and sweet, they are incredible with cheese and even better with a sip of red wine when there is something to celebrate. I found the recipe at Molly Wizenberg’s very enjoyable and always inspiring blog Orangette. Apart from her recipes and beautiful photos, I think what I enjoy most is the honesty in her writing and the courage this takes.
Rather than re-write her recipe I am just going to send you over to her website which you can do by clicking here.
xx

moving to the top end
March 4, 2013 § 2 Comments
3 weeks ago we packed our lives into the back of the car and headed north, straight through the guts of Australia. Into each horizon, one after the next, through orange dust, a heavy car holding our breaths, anticipation for what was ahead.
Well north of Alice Springs, we watched the red earth begin to break with fluorescent green and a sticky humidity.
Why move to Darwin? People seem to ask. We can only shrug our shoulders. This place where fans spin, and rain pours dinner plate drops, and the air sticks amphibian to our skin. We have a house with louvered windows from ceiling to floor, no oven, a resident green tree frog, no hot water, an abundance of tropical fruit trees, and no jobs. Time moves differently, it is slower, but the days pass more quickly. Tomatoes and zucchinis can only be grown in winter and the exotic fruit is strange like echinoderms.
Perhaps I’m here for the green pawpaw salads; a slower pace; a new experience; the perfect job; tomatoes in winter; echinoderm fruit. Perhaps it’s the reminder of another Australia; or maybe its for the geographic nearness to the rest of the world.

spiced roast eggplant and zucchini salad
January 13, 2013 § 1 Comment

It is hot! Stinking hot! The kind of heat with thick hairdryer winds. The kind of heat you feel like you are swimming in rather than walking in. The air is viscous, your arms almost float in it.
I never feel like eating much in this weather other than ice cubes, salads and smoothies. Not all at once of course but spaced between episodes of gasping on the couch with a wet towel on my head and the fan on high no less than two feet from my face.

The recipe below for an eggplant and zucchini salad spiced with paprika, cumin and mint, is both light and rich. The dried figs, walnuts and fetta add a lovely texture to the softness of the roasted vegies.
Spiced roast eggplant and zucchini salad
2 – 3 large eggplants
1 large or 2 small zucchinis
Salt
1/3 cup olive oil
2 Tbsp apple cider vinegar
1 Tbsp honey
1 tsp paprika
1/2 tsp cumin
4 cloves garlic chopped
Zest and juice of 1 lemon
Juice of half an orange
1/2 Tbs tamari or soy sauce
1 cup fresh mint leaves roughly chopped
1/2 cup dried figs roughly chopped
3/4 cup toasted walnuts roughly chopped
1 cup roughly chopped crumbled fetta


Preparation
Preheat oven to 200°C /400°F
Cut the eggplant and zucchini into 1-inch cubes and put in a large bowl. Sprinkle lightly with salt and set aside for about 15 minutes or until juices start to come out of the eggplant. Rinse in cold water, drain and pat dry.
In the meantime, combine olive oil, vinegar, honey, paprika, cumin, lemon zest, half the lemon juice and chopped garlic. Stir into the salted and washed eggplant and zucchini.
Spread the mixture onto a large baking paper lined baking dish and roast in the preheated oven for 45 minutes, or until very tender and browned. You will need to check on them and give them a toss halfway through the cooking. Remove from the oven and allow to cool slightly.
Place roasted veggies in bowl and add tamari, orange juice and the last half of the lemon juice. Toss. Stir in the mint, figs, walnuts and feta and enjoy.
Serves 4

hello 2013
January 4, 2013 § 2 Comments

I was camping at the Grampians for new years, watching birds and stars, climbing mountains and drinking lots and lots of tea. It was such a peaceful way to start 2013, and I feel like this year is going to be great! It is just a feeling, which is perhaps more important than any materialisation of the thought, but that’s ok too.
This festive time of year always makes me think of my mum and her bean salad. It often ends up on the table on special occasions and Christmas and new years are no exception.
As easy and very simple dishes often are, this has always been one of my favourites. This year however, I have started making it with some fresh apricots chopped up and thrown in too. There is something lovely about the tartness of the vinegar with the sweet freshness of the apricots and the greenness of the beans and basil. Below, I have put mum’s recipe but feel free to add some apricots if you would like.

Mum’s Green Bean Salad
2 huge handfuls of green beans
A splash of olive oil
A few splashes of balsamic vinegar
A good sprinkle of sea salt
A very good handful of roughly chopped basil
Top and tail beans, cut in half and steam until fluorescent green and crispy. Take off the heat and rinse in cold water to stop the cooking. Whilst the beans are still warm add the olive oil, vinegar and salt and mix in. Once the beans are cool add the basil.
This salad can be served straight away or left to marinate for a couple of hours and served at room temperature.

the way I like it
December 12, 2012 § 5 Comments

I have always taken on a rather flippant character in the kitchen and I have always been very hopeless at following recipes. It’s a bit like an uncontrollable desire to not do as I am told. But I think this also comes from being an impatient kind of person – I can never be bothered to measure things properly, I can’t stand all those different sized measuring spoons, and never seem to be able to find the measuring cup in our chaotic and unruly cupboards. I’m also impatient enough to forget that it is this very nature that is the reason for unruly cupboards in the first place. Things get thrown on shelves with doors slammed and a quick prayer that nothing will come tumbling out when displaced by the new object that has descended upon its turf.
I admire those people, who don’t seem to notice the things that slow them down, those that can measure flour down to the milligram, who level a cup with the scrape of a knife, who follow a recipe methodically.
The recipe below for beef rendang is one I first ate at my friend and colleague Noel’s house. Noel and his wife Jenny are amazing cooks. The recipe came out of an old and battered book, with pages yellowing and crinkled at the sides. They picked it up when they were in Indonesia, perhaps more than 30 years ago, and they have been cooking out of it ever since. It is very much my kind of recipe – humorously vague with a few Indonesian words for ingredients thrown in here and there. It leaves much to the imagination. But it is also an absolutely beautiful recipe. The meat becomes lovely and tender with hours spent cooking and the flavours are rich and creamy.
Below I have written the recipe directly from the book, but with some added notes in honour of people who like things more precise, and in an attempt to be more like that myself. I hope you enjoy.

Rendang Padang
1 lb steak (I used 600g)
2 – 4 tsp chilli
1 scant tsp laos (galangal powder – I used fresh)
1 medium onion grated
1 small clove garlic crushed (I used 2)
1 bay leaf
1 tsp salt
3 cups thick santan (coconut cream)
1 knob ginger (I used about 1 inch)
½ tsp turmeric
1- 2 stalk/piece lemon grass pounded (and chopped)
Asam (juice of half a lemon)
(I also added 2 small potatoes and a small sweet potato)
Cut the meat into serving size pieces and place in a wide saucepan (with hot oil – brown the meat).
Crush Ginger and add, with onion and garlic and other spices (stir until fragrant).
Add Santan (coconut cream).
(Add potatoes and sweet potato)
Bring quickly to the boil, stirring frequently to prevent catching until the oil comes out.
Continue the slow cooking until the oil is re-absorbed. This can take 2-3 hours told, even up to 8 hours (I cooked for about 2 hours, being impatient offcourse).
The dish should be completely dry when served (I think they mean thick here).
(Serve with rice)
Note: New potatoes, red beans (previously soaked over night), or pieces of young jackfruit, can be added to this dish when the santan has come to the boil.
Instead of beef – can use chicken, prawn, duck, liver, egg, goat, or kangaroo meat.

there’s time
October 24, 2012 § 7 Comments

Hello…
Well, I made it. I am on the other side of something quite big, something that has kept me rather distracted from myself and all the other things I have wanted to do for the past two years. I have finished my masters! And there is a very peaceful knowledge that time is now on my side. It belongs to me again. This is nice. Well very nice actually. Overwhelmingly fantastic!

So here I am with some space, to do something for myself, slowly and how ever I want to. Thats a lovely feeling.


The garden is caught between winter and summer and remains positively neglected and wild. But, this is not so bad, because I know that it doesn’t have to be that way.


Its wonderful to know I can now spend more time taming broad beans, if thats what I want to do. But perhaps more importantly, more time nourishing my wicked taste for very fine delicious things.

Thanks to a very delicious breakfast eaten here and to Jamie Oliver for the idea for this recipe.
Smashed Broad Beans and Peas
2 cups fresh podded broad beans
1 cup fresh podded peas
a decent handful of fresh mint
a decent couple of splashes of olive oil
juice of one lemon
about 1/4 of a garlic clove crushed
Salt and pepper to taste


Cook the peas and beans in boiling water for no more than two minutes, drain and rinse in cold water immediately. Pull the outer skin of each podded broad bean – and puree all ingredients together.

Its that easy

Serve on toast with a poached egg and a smattering of finely grated pecorino.
